CenterPoint Payroll
- Employee Tracking & Reporting by Payroll Department/Group
Payroll Departments/Groups Video - Duration 8 min 42 sec_24.jpg)
| Document #: | 3081 | Product: | CenterPoint Payroll |
|---|
CenterPoint Payroll departments are used to group employees into logical work units for payroll processing and reporting. For example, you might have departments for office work, field work, warehouse, or any title that represents a work crew in your business.
Step A - Create Payroll Departments/Groups
Step B - Assign the Departments/Groups to the Employees (optional)
Additional topics included:
Step A - Create Payroll Departments/Groups:
- Select Setup > Payroll Details > Payroll Departments/Groups.
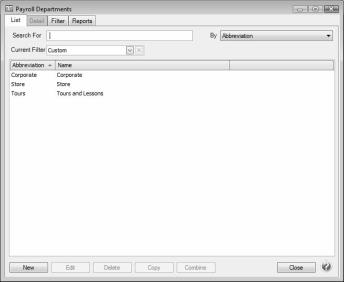
- Click New. If this department/group is similar to an existing department/group, select the similar department/group and click Copy instead of New.
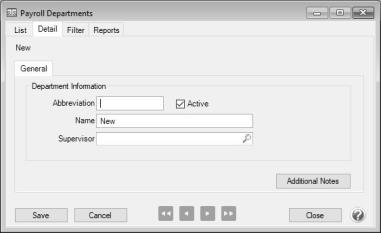
- Enter an Abbreviation and Name for the department/group.
- In the optional Supervisor box, enter or select the supervisor responsible for department-level management/approvalof employee time. If you use the online CenterPoint Time Clock, and the payroll department is assigned a Supervisor, employees assigned to the payroll department will display this supervisor in the Time Off Requests and Entered Time will be Approved by fields in the Approval section of Setup > Employees > Time Clock tab.
- Click Save. Repeat step 2-5 for each department/group in your organization.
Step B - Assign the Departments/Groups to the Employees (optional)
A default department/group can be assigned to each employee. The department/group will then be assigned to the pay run transactions automatically (but can be changed) and you can group employees by department/group when doing payroll in Pay Employees. Below, we've addressed how the department/group can be assigned to one employee at a time and how to assign a department/group to multiple employees at once.
Assign a Department/Group to the Employee
- Select Setup > Payroll Details > Employees.
- Select an employee and click Edit.
- Select the Employment tab. Enter the appropriate Department/Group.
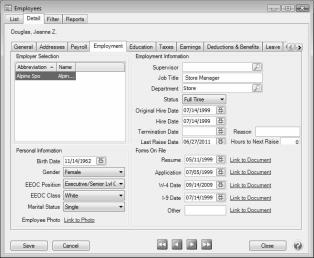
- Click Save. Repeat for each employee.
- Select Setup > Payroll Details > Employee Mass Update.
- All employees will be displayed on the List tab. Select all the employees in one department/group (select multiple employees by pressing the CTRL key while you make your selections).
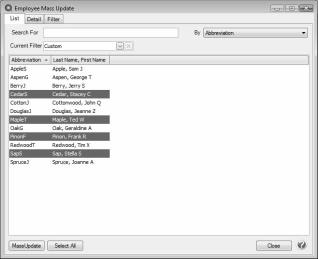
- Click Mass Update at the bottom of the screen.
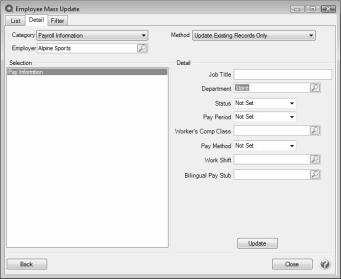
- Select Payroll Information in the Category field.
- Select the Employer.
- Select the appropriate mass update Method:
- Update Existing Records Only updates only employees currently assigned to the item updated.
- Update Existing/Add Missing Records updates all selected employees with the details. If the department/group is not assigned to an employee, it is added. If the department/group is currently assigned, it updates the details.
- Only Add Record if Missing updates all selected employees that currently are NOT assigned to a department/group. If the employee is currently assigned, no changes are made.
- In the Detail section on the right, select the appropriate Department/Group for this group of employees.
- Click Update.
- The Mass Update Review screen will display all changes. Click Accept to save the changes. Click Reject to cancel the changes.
- Repeat the step 2-9 for each department/group until all employees are assigned to a department/group.
Step C - Processing Payroll
If the department/group assigned to each employee is the only department/group they work in, nothing in the process you currently use to pay employees will change. Although you can use the new Filter option to select employees to be paid by department/group:
- While selecting which employees to pay. Select the + button next to Filtering.
- In the Click Here to Filter List field, select Payroll Department/Group. Then to the right of that field, select the department/group to be selected to be paid.
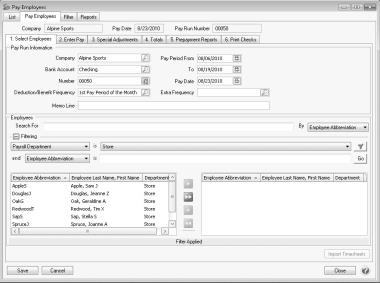
- The employees displayed will then only be those assigned to that department/group. Click on the green double arrow to the right to select all employees in that department/group.
If your employees work in various departments/groups during the same pay period, or change departments/groups from one period to another, then you will want to specify on their pay run transactions, which hours are for each department/group. This can easily be done by adding the department/group field to the Pay screen:
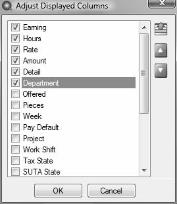
- While on the 2. Enter Pay tab in Pay Employees, right-click in the grid and select Add/Remove Columns.
Note: If you are using Time Sheets, this same process can be followed to add the department/group column to Time Sheets.
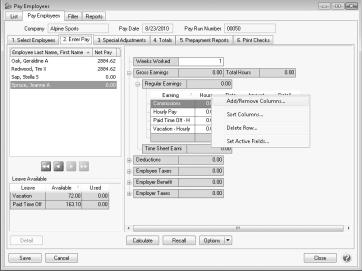
- Select Department/Group and Click OK.
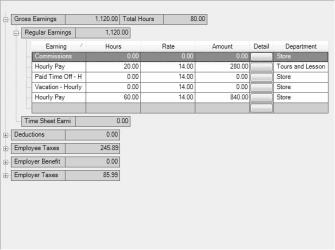
- The normal pay screen will now include a Department/Group field where you can specify hours for each employee/department/group.
Step D - Generating Reports
General Terms Used On Payroll Reports:
Pay Department/Group: Refers to the department/group assigned in the payroll records.
Department/Group: Refers to the department/group assigned in the employee setup.
Using Department/Group as Selection Criteria on Reports
Although it's not displayed by default, department/group can be added to the selection criteria for the majority of Payroll Data Reports. The department/group shown on the Payroll Data reports is the department/group assigned to the employee. To add the selection criteria to a report:
- After selecting Payroll Data Reports, the default Report Selections are displayed on the right.
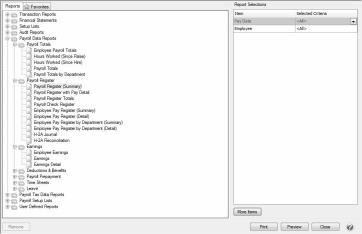
- If Department/Group is not listed, click on the More Items button.
- Select Employee Dept and click OK.
Total Labor Costs by Department/Group
For payrolls where multiple departments/groups have been used for individual employees, a payroll register detail can be run that will sort the earnings by the Pay Department/Group. This example steps through applying a group/sort by pay department/group and how to filter the report by a department/group.
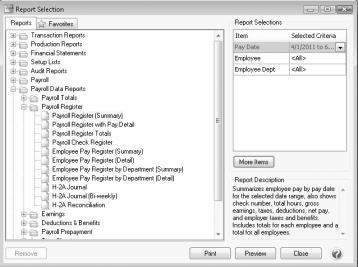
- Select Reports > Reports > Payroll Data Reports > Payroll Register > Payroll Register with Pay Detail.
- In the Report Selections, select the appropriate Pay Date range.
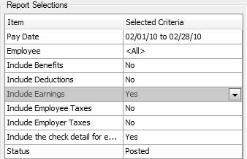
- Select No for: Include Benefits, Include Deductions, Include Employee Taxes, and Include Employer Taxes.
- Select Yes for: Include Earnings and Include the check detail for each employee.
- Click Preview.
- From the preview screen, click on the Group & Sort tab on the left.
- Select Pay Department/Group and use the green up arrow to move Pay Department/Group up after Company Name.
- Verify that Pay Department/Group has a check in both the Group and Sort column.
- Click Refresh.
- The payroll records will now be grouped and subtotaled by the department/group assigned in the pay run records.
 button to save the customized report on the Favorites tab.
Additional Topics:
Change an Existing Payroll Department/Group
- On the Setup menu, point to Payroll Details, and then click Payroll Departments/Groups.
- Select the payroll department/group to be modified and then click Edit.
- Edit or view the payroll department/group detail. To edit another payroll department/group, click or to display the previous/next payroll department/group.
- Click Save to save the payroll department/group and return to the List tab, or click Close to save the payroll department/group and close the Payroll Departments/Groups screen.
Combine Two Payroll Departments/Groups
Combine button allows information from one master file record to be merged together with another master file record. The original master file record will no longer appear on the List tab. All information will be available in the master file record the original was merged with.
- On the Setup menu, point to Payroll Details, and then click Payroll Departments/Groups.
- Select the payroll department/group you want to combine.
- Click Combine.
- On the Combine screen, select the payroll department/group you want to combine your selection with.
- Click OK. At the "Are you sure you want to combine (the payroll department/group you selected in Step 2) into (the payroll department/group you selected in Step 4)?" message, click Yes.
Delete a Department/Group
- On the Setup menu, point to Payroll Details, and then click Payroll Departments/Groups.
- Select the payroll department/group you want to delete, and then click Delete. Note: You cannot delete a record that is linked to other records in the system.
- At the "Are you sure you want the item deleted?" message, click Yes.